Showing posts with label DIY. Show all posts

Sunday, December 18, 2011

More DIY presents

I can't believe Christmas is almost here.  Where did December go??  Thank God I've been on my game with gifts this year (which is most definitely not like me).

I just finished another one of my more labor-intensive gifts and I'm actually pretty excited about it!  I saw this crafting blog on Pinterest and immediately loved it.  This particular post shows how to make coasters from basic ceramic tiles, fun scrapbooking paper, and modpodge.  What a great idea!  I always see those cute coaster sets in stores and can't get over how crazy expensive they are.  And they're always in sets of four.  I mean, who's only going to need four coasters? Seriously.

I had every intention of making a set for myself with the scrapbooking paper.  And then I had a brainstorm.  What if I used pictures instead?  I could use them as a personalized present idea!  I immediately thought of my friends Ray and Ashleigh who were just married this past summer.Ashleigh can be pretty crafty herself, so I knew she'd appreciate the DIY aspect of it as well.

Here's what you'll need:


- ceramic tiles from your local hardware store ($0.16 at Home Depot)
- modpodge
- the pictures you're going to use
- acrylic top coat
- felt pads
- scissors, cutting board, etc.


I originally debated using real pictures with this, but I wasn't sure how the thicker paper would react.  I erred on the side of caution (and convenience) and found digital versions of the pictures I wanted to use.  Thanks Facebook!  I cropped each picture to 4x4 and printed them out on regular old computer paper.  Then I trimmed all the excess paper from around the edges.


Using a sponge brush, I painted on a thin layer of modpodge onto a clean tile.  Gently place the picture onto the tile and adjust so it's it's centered.  I don't have a fancy scraper, so I just used an old movie loyalty card to smooth out the paper.  Then I added another thin layer of modpodge on top.


Not too bad for my first attempt!  Once the glue was dry I added a second coat to be thorough and let them dry overnight.  The next morning, I added a top coat of the acrylic spray paint to seal and waterproof the coasters.  Let them dry, repeat.  I think I did three coats total.  Maybe I should have done more, but I was cold and just wanted to come inside.


Once they were completely dry, I added felt pads to the bottom to prevent scratching.  Sorry for the terrible picture!  I couldn't get my flash to cooperate.


Tah-Dah!  All ready to be wrapped and given as a present!

Sunday, December 11, 2011

Candy Cane Vodka

I've been slacking with posting lately, but I have a valid reason!  My big project at the moment is for my mom, and since she sometimes reads my blog, I can't exactly post pictures.  I promise though, once Christmas is over I'll post all about it!  I'm really excited about this one I can't wait to see how it comes out!

In the meantime, I'll share my most recent mini project.  I learned here that you can  make flavored vodka using any sugar-based candy.  So, in honor of the holiday, I chose to make...

Candy Cane Vodka!


Very few ingredients needed

- vodka
- mason jars (I went with pint jars)
- candy canes


I added two broken up candy canes to each jar, and filled it most of the way with vodka.  The candy starts dizzolving immediately, which is kind of cool to watch.


Cap them, and let them sit for about 2 days.  I shook mine up occasionally to help the process along, but I honestly don't know if that made a difference or not.


Finished product!  You can either use as it, or dress is up to give away ad presents.  Since I'm not a big drinker, I went for option #2.


I know, the bow is a little over-exaggerated.  I loved the candy-cane string, it just didn't allow for pretty little bows.  Oh well.  Thats a lot of vodka.  I doubt anyone will notice after a few candy cane martinis.

Thursday, December 1, 2011

Twofer Thursday

I actually made TWO crafts today.  Look at me- I'm a regular Suzy Homemaker.  Except for that whole part where I still have no idea what I'm cooking for dinner.  Oh well.  Can't have everything.

Craft #1- Firestarters

One of my friends is... an outdoorsman shall we say?  He lives very simply and I'm pretty sure he keeps all of his money in his mattress.  I had no idea what to get this guy for Christmas.  The only things he really wants are car parts for the junkers he keeps in his yard.  Luckily, I have a brilliant boyfriend.  He suggested that I make this friend firestarters for his wood stove and bonfires.  So that's what I did!


They're not pretty, but they're definitely handy.  And (like everything else) pretty easy to make.


You'll need wax, a double boiler to melt it, the bottoms of egg cartons, and dryer lint.  While your wax is melting, fill each well of the carton with dryer lint. 


When the wax is fully melted, (make sure you're stirring!) fill the wells the rest of the way.  The lint will compact, so I made a second pass to make sure they were all full.


Let them cool completely, then break them up!  From what I hear they'll even get a fire going with wet kindling.  I don't build many fires, so I'll have to take my friend's word for it.

Craft #2 Candles!

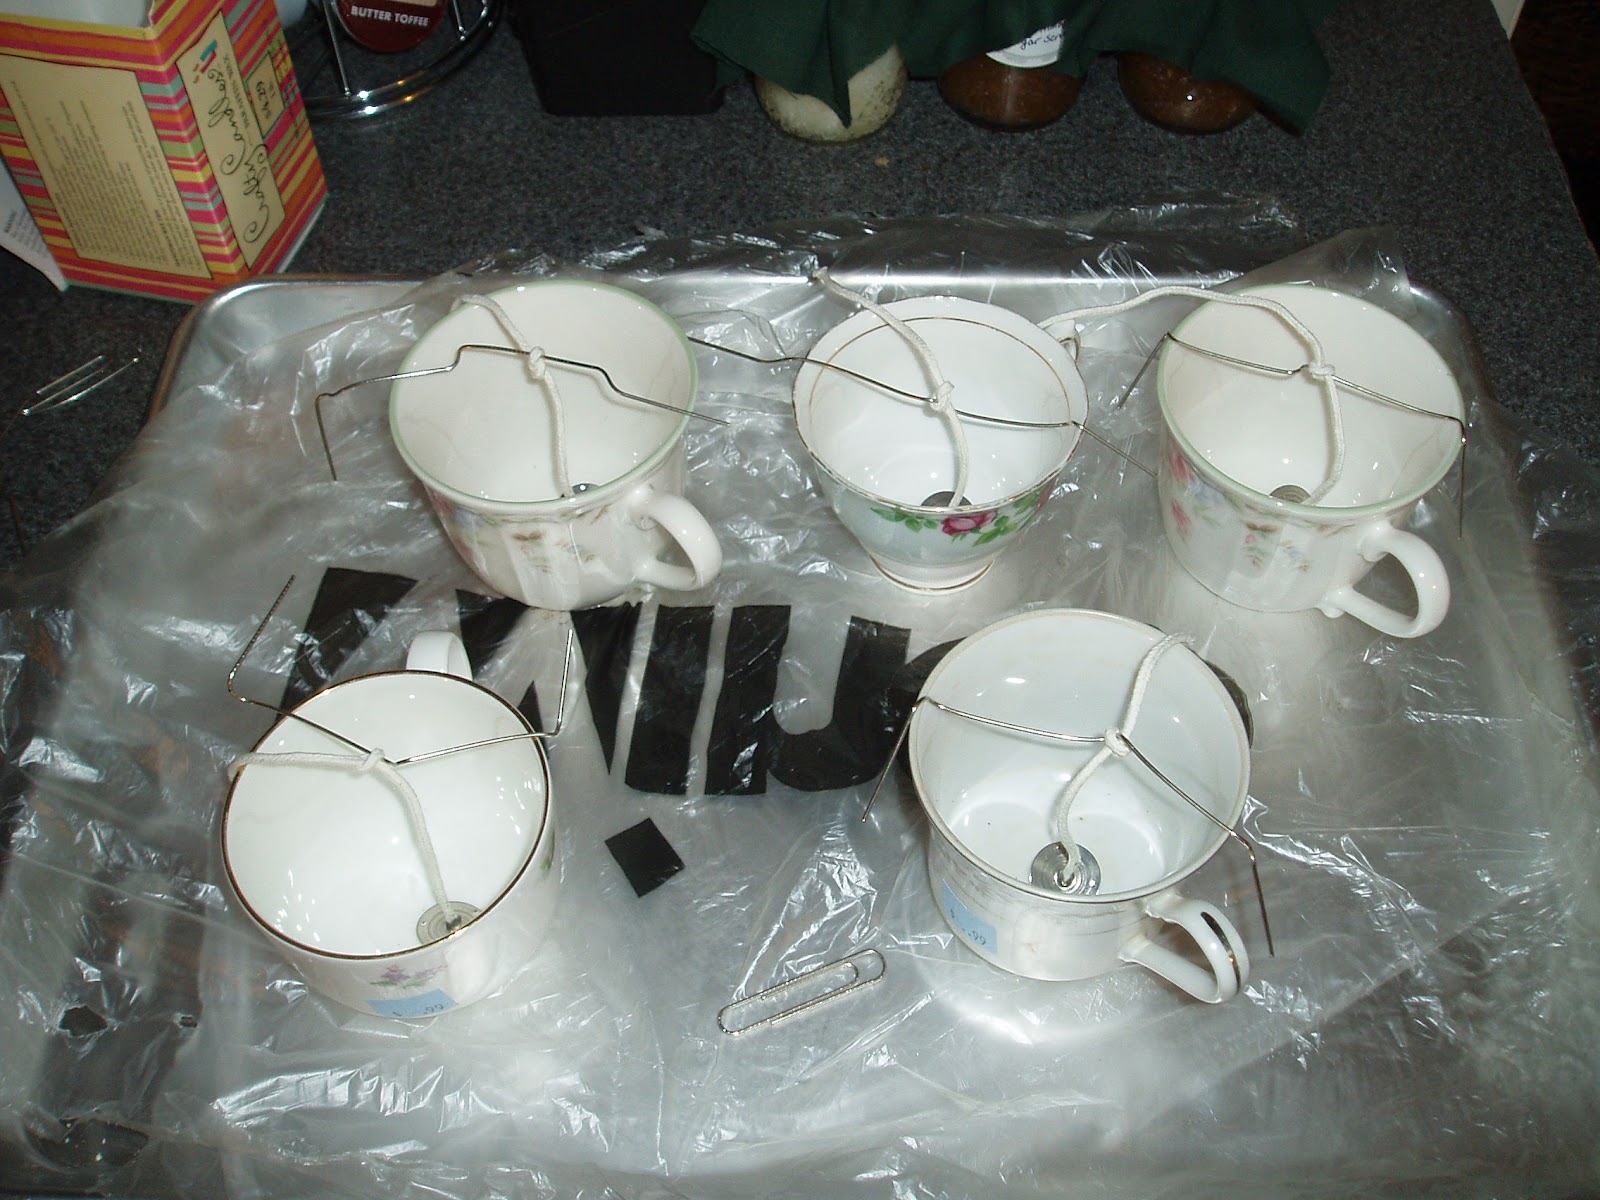
I knew that I would have extra wax, so I made a few candles as well.  I saw this on Martha Stewart's website and thought it was pretty cute.  Candles in old teacups?  Sure.  Why not?  I was at Goodwill a few days ago for a different, yet to be completed project, and I saw the cups.  I snapped them up for under $1 apiece.  I got some wick, wick anchors, and some cinnamon apple scent.


I used bent paperclips to hold the wicks.  They weren't perfect, but they weren't terrible for my first time.


Once I was finished making the firestarters, I added about 30 drops oil to the remaining wax and filled the cups.  Let them dry, trim the wick and that's it.


cute!

Wednesday, November 30, 2011

Sugar Scrubs

Today's project was DIY sugar scrubs.  Just like my honey butter yesterday, it was really simple and yielded a great result.  I admittedly haven't tried it yet, but I did handle it a little bit while testing the consistency and my hands smell wonderful.

I got the basic ideas from here and here, and tweaked it for what I had.

All I used was sugar (granulated or brown depending on the batch), oil, and essential oils


For my first batch, I used 2 heaping cups of brown sugar, about 3/4 cup olive oil, and about 25 drops of peppermint.


I started by adding only 1/2 cup of the oil, and continued to add more until it reached a consistency that I liked.  In the end, it was best described as a crumbly paste.

The second batch was very similar, but I used honey almond oil.

The last batch was lavender vanilla, and I decided to go with regular, granulated sugar.


Each batch yielded two, 8oz jars.  I prettied them up with some pretty fabric, string, and jingle bells.


Voila!  Pretty Christmas gifts, just waiting to be given away.  The best part is that the lavender vanilla batch made some extra, so I get to paper myself a little as well.  I'll let you know how it is!